
XWORKS X32 Builder's Guide
XWORKS X32 Builder's Guide
This step by step installation guide is dedicated to the XWORKS X32 assembly. It is recommended you follow the step in the right order to avoid last minute surprises.
You can also download the PDF version of this guide.
Once you're done, please share your build with us!
Assembly Guide
1. Lay down each components.

2. Attach the anti-slip pad underneath both Panel A & B.

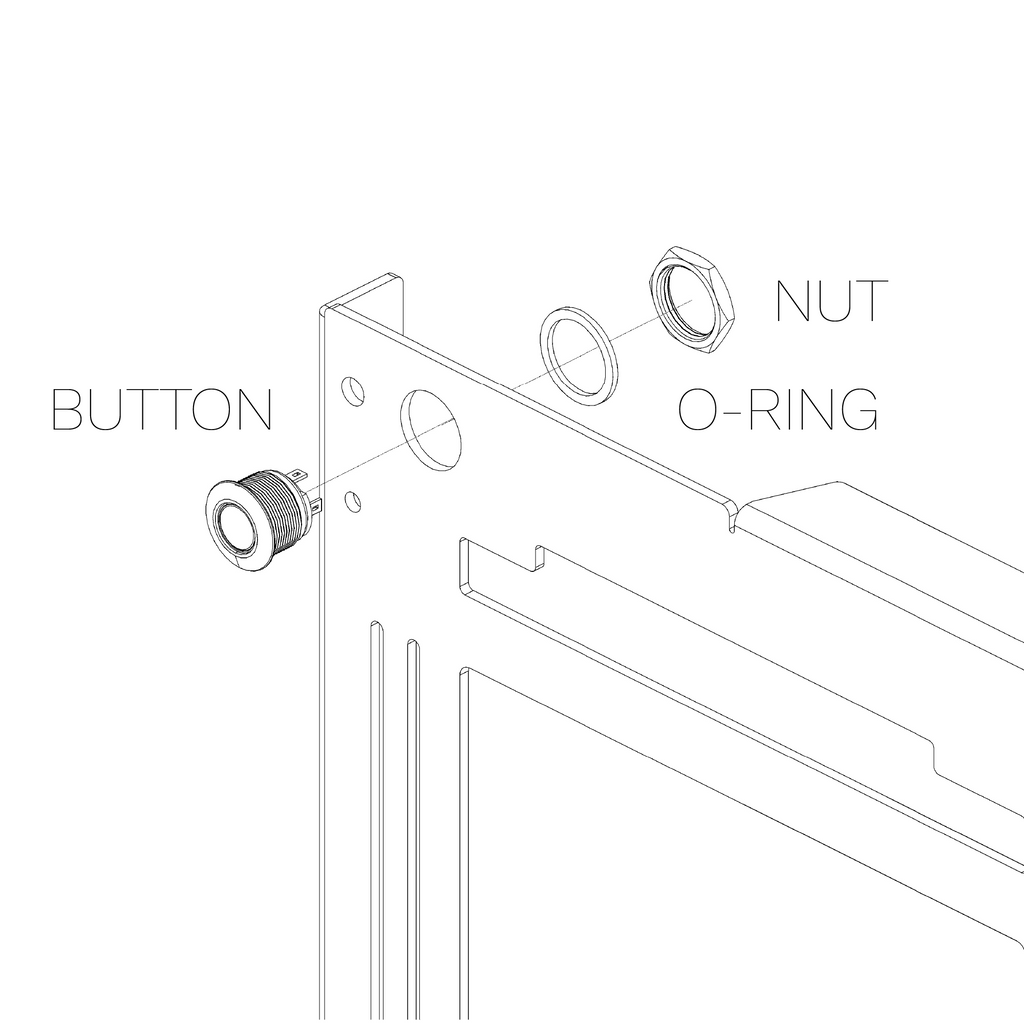
3. Power button installation on side panel A
4. Attach top bar with 2x A standoffs

5. Install 4x B motherboard standoffs secured with 4x J screws

6. Install 2x C standoffs using 2x J screws on side panel B

7. Secure 2x D Stand-offs using 2x J screws

8. Mount PCI-E riser using 2x J screws

9. Secure your storage drive (SSD/HDD)

10. Attach cable to PSU (if modular) and install the PSU shroud

11. Attach PSU Shroud to PSU with 3x E screws

12. Secure PSU module to the side panel B with 4x F screw

13. Install / route your cable to you storage drive, and GPU. Use the cable slot and cable tie holes to arrange nicely.

14. Join both side panel together using 2x J screws at the bottom of side panel A

15. Secure the top part of the case with 2x G screw and the GPU bracket

16. Unlock the PCI-Express riser and install the graphic card.

17. Secure Graphic card to the GPU bracket with 1x H screw and 1x H lock nut

18. Install motherboard with 4x J screw

19. Attach power cable and start button cable to your motherboard.

20. Enjoy your build!
Diagnostic tips & tricks
This section help you with common things that can help diagnose your build.
A. The Graahic Card seems not detected when using the PCI-E riser but it is ok when connected directly on the motherboard.
This is a known issue with PCI-E Riser and combinations of Graphic Card and Motherboard. The XWORKS X32 uses a PCI-E Gen3 riser.
With the Graphic Card directly attached to the motherboard : Enter Bios and set the "PCIE Link" (or similar option) to "Gen3". Confirm it boots, then reinstall the PCI-E riser and Graphic Card.